Gatsby site search with Lunr.js
Building site search for a static website isn't easy. Here's how you can leverage Lunr.js to create search components that are accessible, fast and extensible.
By Luke Whitehouse on
Whether it's a blog or commercial product, providing users with a mechanism to search your website for the content they're looking for is a perfect way to reduce dropout rates and increase conversion. They're also pretty tough to get right, especially when it comes to a static website.
In this post we'll go through creating a collection of accessible Site Search components for your Gatsby powered website, using Lunr.js, an open source search library built in JavaScript.
If you'd like to use the contents of this tutorial in your projects, I've published a fully functional starter on Github, open source under the MIT license. Any feedback or help will be greatly appreciated moving forward.
lukewhitehouse/gatsby-starter-blog-with-lunr
A brief introduction to Lunr.js
Lunr.js is a client-side search library that claims to be a simpler alternative to enterprise solutions such as Solr, Elastic Search and Algolia, even going as far as theming the product after Solr.
A bit like Solr, but much smaller and not as bright
By providing Lunr with a JSON object containing a list of pages, it will create an index of them for you to query against and display to your users. You can do this one of two ways: building the index on the fly in the browser or pre-building it. By doing the latter, you're taking away the heavy load from your users, resulting in dramatically decreased load times for your site, and this is exactly how we’ll be doing things. Let’s get started.
Setting up a Gatsby blog
I'll be using Gatsby's official blog starter in this tutorial. If you'd like to follow along, go and grab the gatsby-cli by installing it globally from NPM's registry via npm or yarn.
$ yarn global add gatsby-cli
$ npm install -g gatsby-cli

// Check it installed correctly
$ gatsby --help
Once installed, use the CLI to set up gatsby-starter-blog in a new folder.
$ gatsby new gatsby-starter-blog-with-lunr https://github.com/gatsbyjs/gatsby-starter-blogNavigate to your new blog and run gatsby in develop mode through the NPM script setup for you in the starter kit.
$ cd gatsby-starter-blog-with-lunr
$ yarn develop
You should now be able to navigate to your new blog at http://localhost:8000.
Installing Lunr
Rather than having to setup Lunr from scratch, we'll get 50% of the way there with the gatsby-plugin-lunr package created by the talented team at humansee labs. Once hooked up to our blog's data, the plugin takes care of pre-building our search index for us, and with Gatsby being a static site generator, it doesn't change our development workflow either.
Go ahead and install the Gatsby Lunr plugin via npm or yarn, depending on your preference.
$ yarn add gatsby-plugin-lunr
$ npm install --save gatsby-plugin-lunr
Once installed, we need to configure our new plugin. Within gatsby-config.js create a new entry within our plugins array referenced below.
module.exports = {
  siteMetadata: {
    // preset data
  },
  plugins: [
    // preset plugins
  ]
}
Our new object entry will need a resolve field to reference our plugin's package name.
{
  resolve: 'gatsby-plugin-lunr'
}
You can then pass any number of parameters defined by the plugin within an options object.
{
  resolve: 'gatsby-plugin-lunr',
  options: {
    // options here
  }
}
gatsby-plugin-lunr maps its parameters like-for-like with the Lunr.js API itself, so there's quite a few. For our simple implementation though, we won't be needing the full set. For the first of which, Lunr.js has full multilingual support for indexing, so we must specify a language using ISO 639-1 language codes. In our case, we'll set this to en (English).
{
  resolve: 'gatsby-plugin-lunr',
  options: {
    languages: [{ name: 'en' }],
  }
}
Next, you'll want to specify some fields to index. Create a fields array and we'll populate it with what we'd expect our user's to be querying against.
{
  resolve: 'gatsby-plugin-lunr',
  options: {
    languages: [{ name: 'en' }],
    fields: [],  }
}
If you're following along with Gatsby's starter blog then you'll find all blog posts within the content/blog directory. There will be a folder for each blog post slug, with a markdown file for the post's content, alongside any imagery.
Here's what the folder structure for the starter looks like.
| content
  | blog
    | hello-world
      | index.md
      | salty_egg.jpg
    | hi-folks
      | index.md
    | my-second-post
      | index.md
If you open up the markdown file for the hi-folks blog post, you'll be presented with the following content.
---
title: New Beginnings
date: "2015-05-28T22:40:32.169Z"
description: This is a custom description for SEO and Open Graph purposes, rather than the default generated excerpt. Simply add a description field to the frontmatter.
---

Far far away, behind the word mountains, far from the countries Vokalia and
Consonantia, there live the blind texts. Separated they live in Bookmarksgrove
right at the coast of the Semantics, a large language ocean. A small river named
Duden flows by their place and supplies it with the necessary regelialia.
Our blog uses gatsby-transform-remark in order to translate Markdown into HTML (, and ready to be consumed via Gatsby’s GraphQL API), so we get the benefit of being able to declare additional information about each post, rather than just the filename and the file's contents. Anything between the --- dividers is treated as a key:value pair and put into a frontmatter object, to be consumed by our components. In our case, we've got access to three fields: title, date and description.
Back within gatsby-config.js, locate the empty fields array and add both the title and description fields. For now, we'll populate each field object with the name of our field, and a store boolean to tell our plugin whether or not to store the field in our pre-built search index.
{
  resolve: 'gatsby-plugin-lunr',
  options: {
    languages: [{ name: 'en' }],
    fields: [
      { name: 'title', store: true },      { name: 'description', store: true },    ],
  }
}
Now that we have our fields defined, we need to resolve them to a value. We can use Gatsby's GraphQL instance to help us understand where we can access this data from.
To do so, open up the GraphiQL playground at https://localhost:8000/___graphql. We can use this playground in order to run GraphQL queries set up in our application, and observe the output.
As the markdown plugin our starter comes bundle with already has queries set up to get all the posts in our blog, run the following query.
query {
  allMarkdownRemark {
    nodes {
      frontmatter {
        title
        description
      }
    }
  }
}
This should output a JSON response containing the sample blog posts in our application.
{
  "data": {
    "allMarkdownRemark": {
      "nodes": [
        {
          "frontmatter": {
            "title": "Hello World",
            "description": null
          }
        },
        {
          "frontmatter": {
            "title": "New Beginnings",
            "description": "This is a custom description for SEO and Open Graph purposes, rather than the default generated excerpt. Simply add a description field to the frontmatter."
          }
        },
        {
          "frontmatter": {
            "title": "My Second Post!",
            "description": null
          }
        }
      ]
    }
  }
}
We can now use this information to resolve the title and description fields we declared just a second ago. Back within our config, create a new resolvers object, with a MarkdownRemark object inside which tells the Gatsby plugin that our fields will be resolved through Markdown.
{
  resolve: 'gatsby-plugin-lunr',
  options: {
    languages: [{ name: 'en' }],
    fields: [
      { name: 'title', store: true },
      { name: 'description', store: true },
    ],
    resolvers: {
      MarkdownRemark: {
      }
    }
  }
}
Within resolvers.MarkdownRemark we need to resolve each of our fields. The key must correlate to the field's name in the array we defined above, and the value will be a function which has access to the data of each blog post node.
{
  resolve: 'gatsby-plugin-lunr',
  options: {
    languages: [{ name: 'en' }],
    fields: [
      { name: 'title', store: true },      { name: 'description', store: true },    ],
    resolvers: {
      MarkdownRemark: {
        title: node => node.frontmatter.title,        description: node => node.frontmatter.description,      }
    }
  }
}
Once set up, this will allow Lunr to index the title and description attributes for each of our posts, ready to be queried by our user's. We still need a few more fields though: the post's main body content, the post's URL and the post's date. You can access these fields through GraphQL by updating our query as followed.
query {
  allMarkdownRemark {
    nodes {
      frontmatter {
        title
        description
        date      }
      fields {        slug      }      rawMarkdownBody    }
  }
}
Based on our query, we can now access each post's URL, date and content through node.fields.slug, node.frontmatter.date and node.rawMarkdownBody respectively.
{
  resolve: 'gatsby-plugin-lunr',
  options: {
    languages: [{ name: 'en' }],
    fields: [
      { name: 'title', store: true },
      { name: 'description', store: true },
      { name: 'content' },      { name: 'url', store: true },      { name: 'date', store: true }    ],
    resolvers: {
      MarkdownRemark: {
        title: node => node.frontmatter.title,
        description: node => node.frontmatter.description,
        content: node => node.rawMarkdownBody,        url: node => node.fields.slug,        date: node => node.frontmatter.date      },
    },
  },
}
All of our fields are now hooked up to our data and fully accessible to Lunr. However, we're yet to provide the concept of weight to our config.
Search algorithms are built up by deciding whether or not one piece of data is more important than another so that they can determine which result to show first. For example, Google may prioritise finding a keyword in the title of a page over the page's body content as they consider the page title a better indicator that the page is relevant to the user's search term than that of the main body content.
With that in mind, let's tell Lunr to prioritise our post's titles and description over the URL and content. We can do this with the attributes.boost property in each of our fields.
{
  resolve: 'gatsby-plugin-lunr',
  options: {
    languages: [{ name: 'en' }],
    fields: [
      { name: 'title', store: true, attributes: { boost: 20 } },      { name: 'description', store: true, attributes: { boost: 5 }},      { name: 'content' },
      { name: 'url', store: true },
      { name: 'date', store: true }
    ],
    resolvers: {
      MarkdownRemark: {
        title: node => node.frontmatter.title,
        description: node => node.frontmatter.description,
        content: node => node.rawMarkdownBody,
        url: node => node.fields.slug,
        date: node => node.frontmatter.date
      },
    },
  },
}
If we think of all our fields having a base priority level of 0, then we're saying that we're boosting that value by 20 for our post's title, and 5 for our post's excerpt. In other words, a post title is 20 times more relevant to a user than if the keyword is found in the post's content.
With our field priorities in order, we're pretty much there with our config now. The final thing to do is to tell our plugin where to save our pre-built index file. We'll stick to the default of search_index.json.
{
  resolve: 'gatsby-plugin-lunr',
  options: {
    languages: [{ name: 'en' }],
    fields: [
      { name: 'title', store: true, attributes: { boost: 20 } },
      { name: 'description', store: true, attributes: { boost: 5 }},
      { name: 'content' },
      { name: 'url', store: true },
      { name: 'date', store: true }
    ],
    resolvers: {
      MarkdownRemark: {
        title: node => node.frontmatter.title,
        description: node => node.frontmatter.description,
        content: node => node.rawMarkdownBody,
        url: node => node.fields.slug,
        date: node => node.frontmatter.date
      },
    },
    filename: 'search_index.json',  },
}
To test our configuration, run a build of the Gatsby site, and you should see a search_index.json file in your newly generated public directory.
$ yarn buildNow that we have a search index to work with, we need to build some components that can consume it.
Building our components
Keeping things traditional, we'll start by creating a new page for our blog's search components to be housed. Within src/pages, create a new file called search.js
$ cd src/pages
$ touch search.js
Create a basic Search component for us to expand upon.
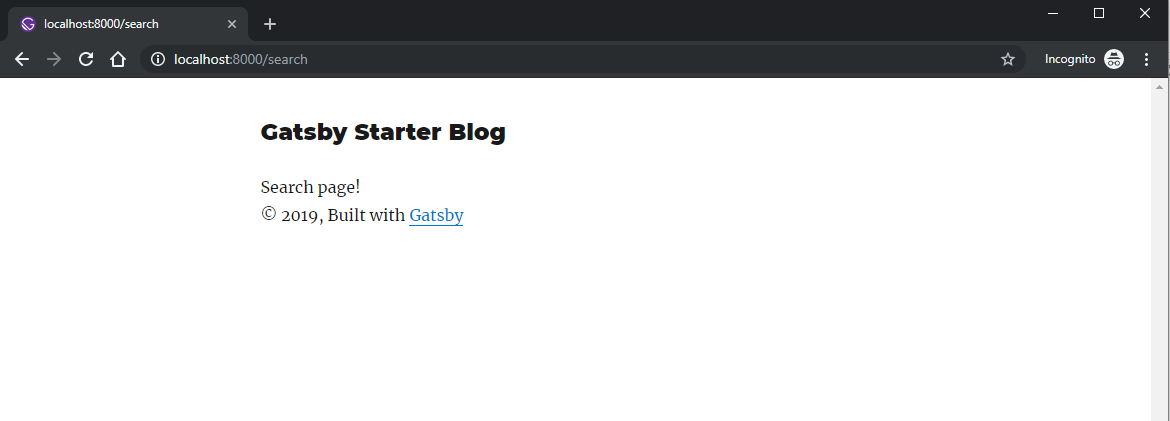
import React from 'react';

const Search = () => (
  <div>Search page!</div>
);

export default Search;
When visiting http://localhost:8000/search, we should see our new component working as expected, with the text 'Search page!' in an unstyled <div/> element.
We can take this a step further by using the Layout component already available to the Gatsby starter. It relies on a couple of props though, so make sure to pass through location, which Gatsby exposes to you from it's instance of Reach Router.
import React from 'react';
import Layout from "../components/layout";

const Search = location => (  <Layout location={location}>    Search page!
  </Layout>
);

export default Search;
The component also relies on a title prop. For this demo, we can use the Site's title which is defined in gatsby-config.js. Once we've set up our GraphQL page query, we'll have access to this through data.site.siteMetadata.title.
import React from 'react';
import Layout from "../components/layout";

const Search = ({
  data,  location
}) => (
  <Layout location={location} title={data.site.siteMetadata.title}>    Search page!
  </Layout>
);

export default Search;
Gatsby exposes anything within the siteMetadata object from our gatsby-config.js as a GraphQL query, so we'll need to create a GraphQL page query in order to get access.
export const pageQuery = graphql`
  query {
    site {
      siteMetadata {
        title
      }
    }
  }
`;
Great, we should now have a page ready for action with some base styling.
Now that we've got a page to work on, let's get started creating our search components.
Create a new file in the src/components directory called searchForm.js and export a new functional component.
import React from 'react';

const SearchForm = () => (
  <div>Search form here</div>
);

export default SearchForm;
Do the same for our search results too src/components/searchResults.js.
import React from 'react';

const SearchResults = () => (
  <div>Search results here</div>
);

export default SearchResults;
We can then import those into our Search page src/pages/search.js.
import React from 'react';
import Layout from "../components/layout";
import SearchForm from '../components/searchForm';import SearchResults from '../components/searchResults';
const Search = ({
  data,
  location
}) => (
  <Layout location={location} title={data.site.siteMetadata.title}>
    <SearchForm />    <SearchResults />  </Layout>
);

// etc
We've now got a base scaffold to build out our components from. Let's get started with our form.
Search form
Within our SearchForm, replace the dummy <div /> with <form /> tags.
const SearchForm = () => (
  <form method="GET">
  </form>
);
Any good search comes powered with deeplinking functionality, meaning that you can hit a URL (say http://localhost:8000/search?keyword=mysearchterm) from an external site and have the results update automatically, rather than requiring a user enter the term manually. By setting our method to GET, we're telling the form to "submit" a GET request to our page (/search), being the default parameter for the action attribute that we haven't specified. Any input values submitted will then have their name attributes appended to the URL in a query string.
The default functionality of the HTML specification is exactly why semantic markup is so important.
Back to our form element, add the role attribute of search.
const SearchForm = () => (
  <form role="search" method="GET">
  </form>
);
According to the WAI-ARIA 1.1 specification, a form that is used for search should use the search landmark instead of the default form landmark. The W3C have examples of this over on their authoring practices site.
Next, create an input field with the type of search, and an accompanying label.
const SearchForm = () => (
  <form role="search" method="GET">
    <label htmlFor="search-input"><h1>Search posts</h1></label>
    <input
      type="search"
      id="search-input"
      name="keywords"
      onChange={() => {}}
    />
  </form>
);
Adding the htmlFor attribute will associate our label with a form control as specified by the field's id. This, amongst other things, provides our user's with the ability to click on the label in order to gain focus on it's associated input.
We've also set a name attribute. This will be used in our form submission, in order to append a query string to the end of our URL when issuing the GET request as we mentioned before.
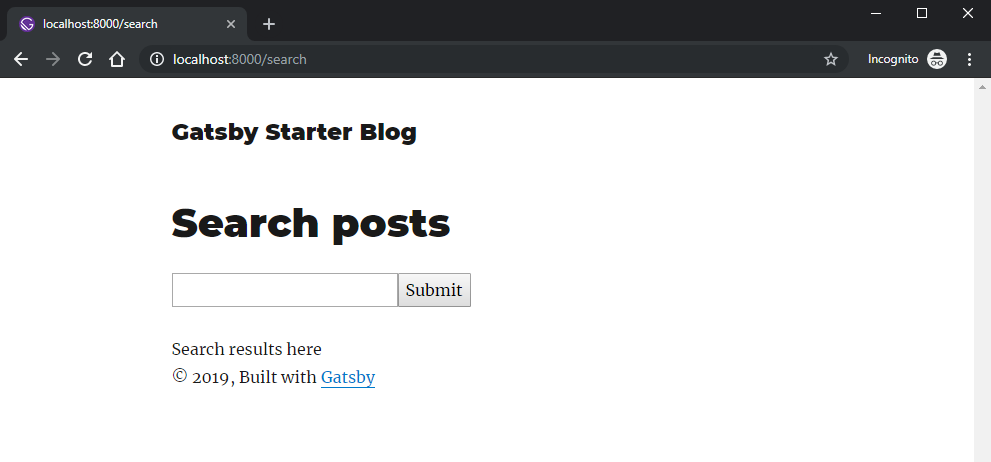
Last but not least, we need a button to submit the form.
const SearchForm = () => (
  <form role="search" method="GET">
    <label htmlFor="search-input"><h1>Search posts</h1></label>
    <input
      type="search"
      id="search-input"
      name="keywords"
      onChange={() => {}}
    />
    <button type="submit">Submit</button>
  </form>
);
Great, if you take a look at that in your browser, you should see the form input and submit button's underneath the input's label, acting as the heading for our page.
Search results
Back to our SearchResults component, swap our <div /> out for a <section /> element.
const SearchResults = () => (
  <section>
    Search results here
  </section>
);
Whilst we have a search landmark for forms, there's no such thing for the results themselves. Instead, we'd need to use the region role, which tells the browser that this section of the page has sufficient importance that a user will likely want to navigate to it easily.
A perceivable section containing content that is relevant to a specific, author-specified purpose and sufficiently important that users will likely want to be able to navigate to the section easily and to have it listed in a summary of the page. Such a page summary could be generated dynamically by a user agent or assistive technology.
However, rather than set this explicitly, the HTML specication explains that by providing a label to a section element, you will in turn automatically covey the role of region. Go ahead and label our <section /> with the aria-label attribute.
const SearchResults = () => (
  <section aria-label="Search results for all posts">
    Search results here
  </section>
);
Now for the results. We're going to want two separate elements, a heading which tells the user how many posts are found, and a list for the results.
Create an h2 element within our section, with the content of "Found X posts on Y". We're going to dynamically fill in those X and Y placeholders later.
const SearchResults = () => (
<section aria-label="Search results for all posts">
<h2>Found X posts on Y</h2>
</section>
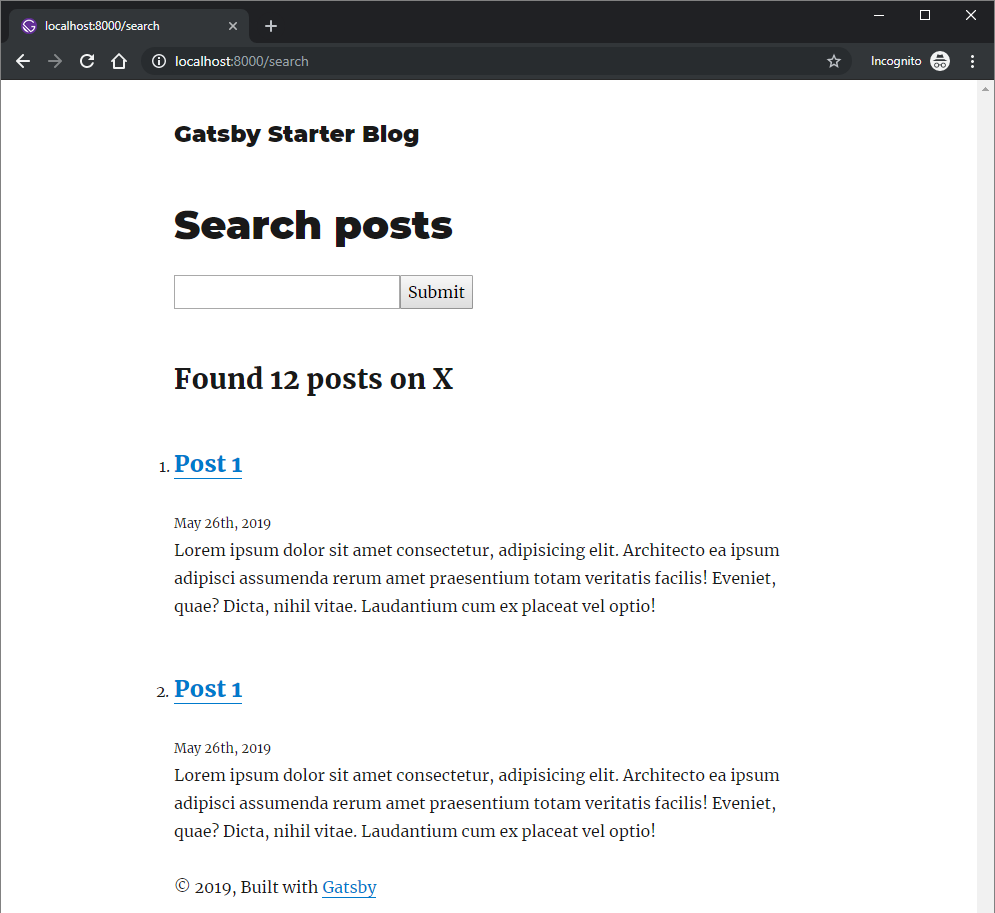
);Next, create an ordered list, with each list item having a heading, date and brief excerpt.
const SearchResults = () => (
  <section aria-label="Search results for all posts">
    <h2>Found X posts on Y</h2>
    <ol>
      <li>
        <h3><a href="#">Post 1</a></h3>
        <small>May 26th, 2019</small>
        <p>Lorem ipsum dolor sit amet consectetur, adipisicing elit. Architecto ea ipsum adipisci assumenda rerum amet praesentium totam veritatis facilis! Eveniet, quae? Dicta, nihil vitae. Laudantium cum ex placeat vel optio!</p>
      </li>
    </ol>
  </section>
);
Great, go to our search page: http://localhost:8000/search and you should see our search results just below the form, albeit a little unstyled.
We can easily fix the styling though, with a few CSS rules. Update the HTML above with the following class names, so that we can access them within our CSS.
const SearchResults = () => (
<section aria-label="Search results for all posts">
<h2 className="search-results-count">Found X posts on Y</h2> <ol className="search-results-list"> <li>
<h3 className="search-results-list__heading"> <a href="#" className="search-results-list__link">Post 1</a> </h3>
<small>May 26th, 2019</small>
<p>Lorem ipsum dolor sit amet consectetur, adipisicing elit. Architecto ea ipsum adipisci assumenda rerum amet praesentium totam veritatis facilis! Eveniet, quae? Dicta, nihil vitae. Laudantium cum ex placeat vel optio!</p>
</li>
<li>
<h3 className="search-results-list__heading"> <a href="#" className="search-results-list__link">Post 1</a> </h3>
<small>May 26th, 2019</small>
<p>Lorem ipsum dolor sit amet consectetur, adipisicing elit. Architecto ea ipsum adipisci assumenda rerum amet praesentium totam veritatis facilis! Eveniet, quae? Dicta, nihil vitae. Laudantium cum ex placeat vel optio!</p>
</li>
</ol>
</section>
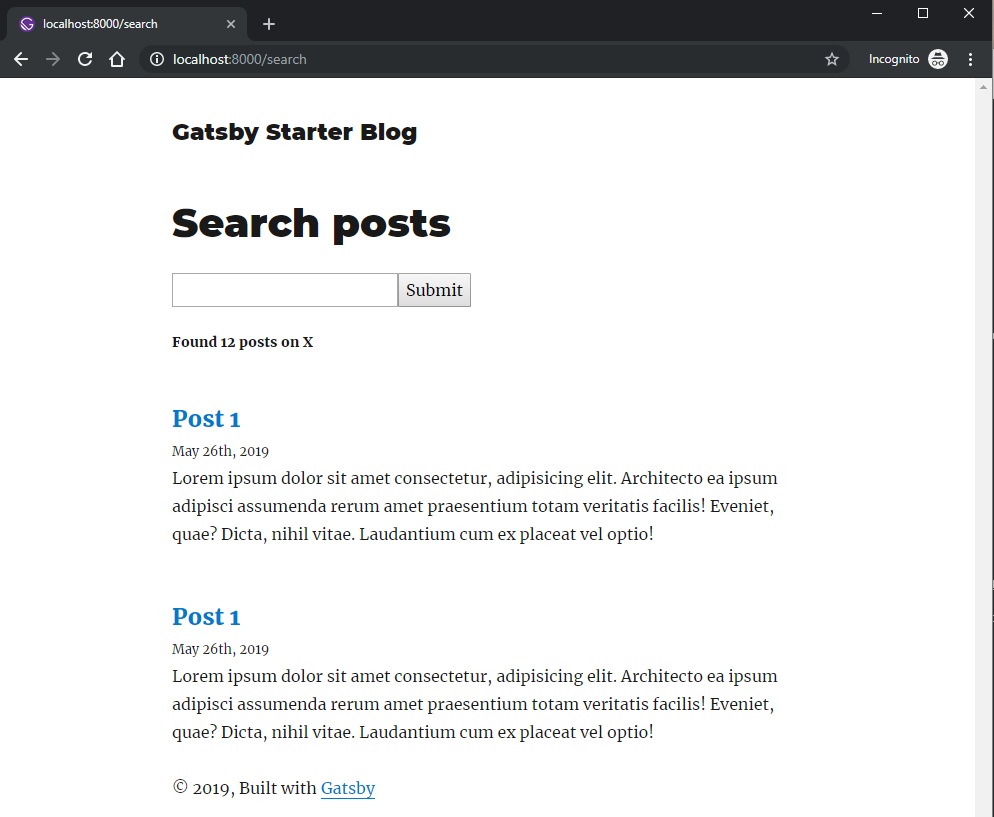
);Create a new folder within the src/ directory called styles, this will house our styling in a file called with-lunr.css. Populate it with the following styles.
.search-results-count {
  margin-bottom: 0;
  margin-top: 0;
  font-size: 14px;
}

.search-results-list {
  list-style: none;
}

.search-results-list__heading {
  margin-bottom: 5px;
}

.search-results-list__link {
  box-shadow: none;
}
To ensure these new styles take hold, import them into src/components/layout.js, which is used for the default layout of every page.
import React from "react"
import { Link } from "gatsby"

import { rhythm, scale } from "../utils/typography"
import "../styles/with-lunr.css"
// etc
Take a look in your browser and you'll see the results have tided themselves up a little.
That's great, but we're still yet to set up our results with accessibility in mind. Let's do that now.
As our search results are going to be auto-updating when filling in the search form, we need to ensure that users who cannot see the results update visually are still aware. This is where ARIA live regions are useful.
From the MDN web docs, ARIA live regions "… provide a way to programmatically expose dynamic content changes in a way that can be announced by assistive technologies"
Live regions are perceivable regions of a web page that are typically updated as a result of an external event when user focus may be elsewhere
When originally looking into live regions I was expecting to set the entire search results containing element as a live entity. The thought being that everything in that area is updating on the fly: the results count that informs the user how many posts has been found for their chosen keyword, and the results themselves.
That was, until I read an article on the GOV.UK website from 2014, explaining recent (at the time) improvements they' made on their search results thanks to user testing assistive technologies, with help from an accessibility consultant named Léonie Watson.
It was suggested that because wrapping the entire results section in a live region would cause the screen reader to read our the entire contents of that section (in this case the entire results); you should instead only wrap the results count within a live region. This would mean that only the sentence "Found X results on Y" would be called out every time, rather than however many posts are found from the results. It would also provide the user with a choice when the region is updated, a choice of whether or not they want to look through the new set of results, or if they want to continue updating their search query.
Simple when you think about it right? It's these nuances that show how a seemingly great piece of functionality for assistive technologies can have an adverse effect when used inappropriately.
Nevertheless, let's look to wrap our results count in a live region.
<h2
  className="search-results-count"
  aria-live="assertive">
  Found X posts on Y
</h2>
The first field we are required to provide is aria-live, which will tell assistive technologies that this element will update on the fly, without a page refresh. Other than off, there are two possible values for this: polite and assertive.
Here are the definitions for each, according to the WAI-ARIA 1.1 specification:
aria-live="polite": Any updates made to this region should only be announced if the user is not currently doing anything.politeshould be used in most situations involving live regions that present new information to users, such as updating news headlines.aria-live="assertive": Any updates made to this region are important enough to be announced to the user as soon as possible, but it is not necessary to immediately interrupt the user. live="assertive" must be used if there is information that a user must know about right away, for example, warning messages in a form that does validation on the fly.
In our case, as our search page's purpose is purely to update the results section with posts based on the keyword you enter, we are safe to use assertive, as there is no other reason to be on this page other than to search for posts. If, however, this was a search input component on another page, then the page has multiple purposes, so we shouldn't be burdening the user with updates until we know they're finished with whatever they're doing at that time. Hense, polite would be used instead.
Accessing Lunr.js indexes
Now that we have our components ready to use, we need to feed some data into them from the search index we configured with gatsby-plugin-lunr earlier.
In order to interact with the generated search index, Lunr provides a global variable accessible on the window object named __LUNR__.
In the browser console, log out window.__LUNR__.
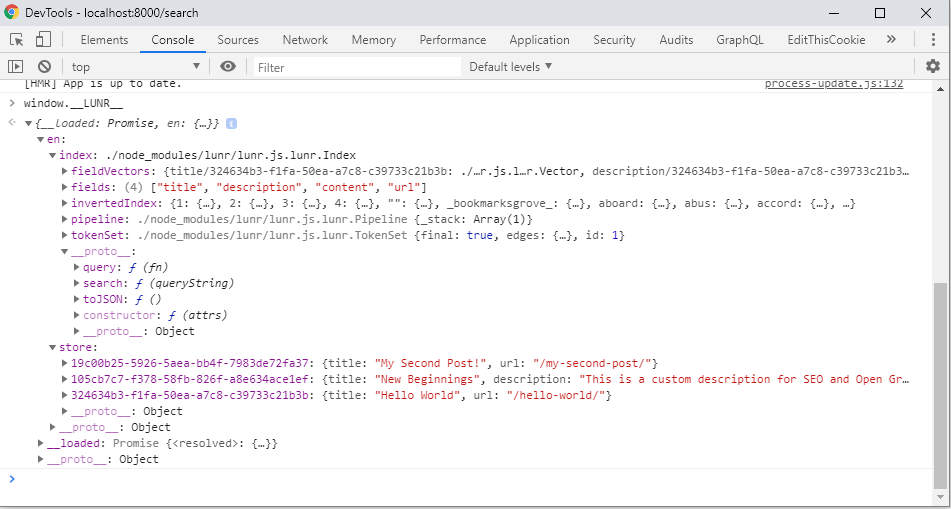
There's a lot to digest here, the gist is that within this global variable we have access to the entire, unfiltered search index at window.__LUNR__.store, which we configured earlier. This allows us to confirm the configuration of our posts has been successful. In addition, we also have access to the Lunr.js API in order to filter down our index to only the posts which meet a user's keyword.
With that said, let's look to use Lunr's API to create a search page which, when loaded, responds to any keywords already present in the URL (to enable deeplinking), but also dynamically responds as a user types in a new keyword.
First of all, we're going to want to use React to store a list of search results based on a user's query. To do so we'll use React's new Hooks API. If you've never used hooks before, don't worry, we'll break things down as we go. For now, open our search page located at src/pages/search.js and expose the useState function from React using named imports.
import React, { useState } from 'react';import Layout from "../components/layout";
import SearchForm from '../components/searchForm';
import SearchResults from '../components/searchResults';

// etc
How does useState work?
useState provides us with a convenient way to access and store state in React, without the need for a class component as in previous versions of React. The first thing to realise about useState as opposed to class-based ways of writing state in React is that rather than having one big variable for all your state, we'll have lots of smaller, compartmentalised variables, each controlling their own state. It's probably best to explain as we go.
When using useState, we execute it with a single argument. This argument acts as the default state for this particular piece of state in your component. We can have multiple useState declarations in one component. Then, useState expects us to assign it to a variable that is a destructured array with two values: the state's current value and a function that updates it.
Back in our search page, declare a new state variable named results, as shown below.
const Search = ({
  data,
  location
}) => {
  const [results, setResults] = useState([]);  return (
    <Layout location={location} title={data.site.siteMetadata.title}>
      <SearchForm />
      <SearchResults />
    </Layout>
  );
};
This is the piece of state which we'll assign from whatever results are returned when a user queries our Lunr search index. We'll use the setResults function to do this, and then use results to display them in our search component.
Next, we need to check to see if Lunr has been loaded on our page. We can use the window.__LUNR__ global as we discussed earlier, and utilise Lunr's __loaded function, which returns a promise that, when fulfilled, will ensure Lunr has fully loaded.
const [results, setResults] = useState([]);

if (window.__LUNR__) {
  window.__LUNR__.__loaded.then(lunr => {
    // Lunr is loaded here
  }
}
Once loaded, you'll have access to the global Lunr object from the returned promise. With this, we have access to the search method which allows us to search our generated index by a keyword. We can access this at lunr.en.index.search, where en represents the chosen language we configured in our gatsby-config.js.
if (window.__LUNR__) {
  window.__LUNR__.__loaded.then(lunr => {
    const refs = lunr.en.index.search('interesting things');  });
}
If you log this out, you'll be returned an array of objects, with each object being a reference to an individual post. Meaning, we've found two posts that have reference to the "interesting things" keyword.
[
  {
    "ref": "07f09e5a-a6e7-5733-9b7c-3e16f62a7c02",
    // other stuff
  },
  {
    "ref": "ce14f1ec-fbbf-5363-b819-fd983842eb7c",
    // other stuff
  }
]
We can then map over this array and use the ref values to find our posts within lunr.en.store.
if (window.__LUNR__) {
  window.__LUNR__.__loaded.then(lunr => {
    const refs = lunr.en.index.search('interesting things');    const posts = refs.map(({ ref }) => lunr.en.store[ref]);  });
}
If you now log out posts, you should get an array of our posts, with all the data we need to populate our results.
[
  {
    "title": "Hello World",
    "url": "/hello-world/"
  },
  {
    "title": "New Beginnings",
    "description": "This is a custom description for SEO and Open Graph purposes, rather than the default generated excerpt. Simply add a description field to the frontmatter.",
    "url": "/hi-folks/"
  }
]
Try swapping out "interesting things" for other words to search our 3 posts on.
After you've had a play with the search function, go ahead and pass the posts into our React state, using the setResults function we created earlier.
const [results, setResults] = useState([]);

if (window.__LUNR__) {
  window.__LUNR__.__loaded.then(lunr => {
    const refs = lunr.en.index.search('interesting things');
    const posts = refs.map(({ ref }) => lunr.en.store[ref]);
    setResults(posts);  });
}
I wouldn't recommend trying that out just yet though, it'll probably crash the browser. The reason being is due to how React renders components. As we currently have no safeguards in place, our component will rerender anytime there's a change, including any changes to state. This wouldn't be a problem, but we've just set up our posts to be stored in our state on every render. Thus creating an infinite loop of saving state and rerendering our component. Let's fix that.
How does useEffect work?
Like with useState, useEffect is another function from React's Hooks API introduced in 16.8. We can import it as a named import from React, just like with useState.
import React, { useState, useEffect } from 'react';import Layout from "../components/layout";
import SearchForm from '../components/searchForm';
import SearchResults from '../components/searchResults';

// etc
useEffect is often interpreted as a mix between three class lifecycle methods: componentDidMount, componentDidUpdate and componentWillUnmount. You declare the hook by passing in a function to execute when the component is rendered (and rerendered). Then, if you're looking to do any cleanup, within the return of your function, call another function which will be executed when the component unmounts.
Got that? Cool. Wrap our window.__LUNR__ script in a useEffect hook.
useEffect(() => {
  if (window.__LUNR__) {
    window.__LUNR__.__loaded.then(lunr => {
      const refs = lunr.en.index.search('interesting things');
      const posts = refs.map(({ ref }) => lunr.en.store[ref]);
      setResults(posts);
    });
  }
});
The hook also comes we a second parameter, which tells it when to call the function, and when to disregard it. This will work perfectly for when we want to only re-render the component when the URL changes, but for now, stick an empty array in its place.
useEffect(() => {
  if (window.__LUNR__) {
    window.__LUNR__.__loaded.then(lunr => {
      const refs = lunr.en.index.search('interesting things');
      const posts = refs.map(({ ref }) => lunr.en.store[ref]);
      setResults(posts);
    });
  }
}, []);
By passing an empty array, we're telling the component to only render once, when we load the page, and never again.
Enabling deeplinking
Every time we refresh our page, Lunr will now run a search query based on the keyword we specify, which is currently hardcoded to "interesting things". By modifying this to run from the keywords query string in our URL, Lunr's search results will be fully integrated with our search form.
In order to do so, we'll need to get access to the URL. We sort of covered this at the start of the tutorial where our Layout component needed access to location, which is exposed from Gatsby's instance of Reach Router as shown below.
const Search = ({
  data,
  location}) => {
With this, we can then use location.search in combination with URLSearchParams. URLSearchParams is a utility method baked into modern browsers which we can use to get the keywords query string from our URL.
const [results, setResults] = useState([]);
const searchQuery = new URLSearchParams(location.search).get('keywords') || '';
useEffect(() => {
  if (window.__LUNR__) {
    window.__LUNR__.__loaded.then(lunr => {
      const refs = lunr.en.index.search('interesting things');
      const posts = refs.map(({ ref }) => lunr.en.store[ref]);
      setResults(posts);
    });
  }
}, []);
URLSearchParamsis not supported in Internet Explorer. Fortunately, there is a polyfill.
Next, replace "interesting things" with our new searchQuery variable.
const [results, setResults] = useState([]);
const searchQuery = new URLSearchParams(search).get('keywords') || '';

useEffect(() => {
  if (searchQuery && window.__LUNR__) {    window.__LUNR__.__loaded.then(lunr => {
      const refs = lunr.en.index.search(searchQuery);      const posts = refs.map(({ ref }) => lunr.en.store[ref]);
      setResults(posts);
    });
  }
}, []);
We should now have a fully functioning search form, which is integrated with our Lunr index, and fully supports deeplinking. Assuming you're logging out results to the console, navigate to http://localhost:8000/search?keywords=hello in your browser, and you should see the results filtered by the text of "hello". Change this keyword a few times to see the results change in your console.
Search onChange input
Our final piece of functionality will allow us to render the results of our form whenever a user updates the search input field, rather than just when the form is submitted (and requiring a hard browser refresh).
First, we need to extend the boundaries of our Lunr search effect. As mentioned before, we're currently only passing an empty squared-brackets into our useEffect, and so only performing our search when the component mounts for the first time. What we really want to happen is to re-run this effect anytime the user inputs a new keyword to search for.
As we know from our deeplinking functionality that we want a search to be performed anytime the query string in our URL changes, let's pass in location.search to the useEffect, instead of the squared-brackets.
useEffect(() => {
  if (searchQuery && window.__LUNR__) {
    window.__LUNR__.__loaded.then(lunr => {
      const refs = lunr.en.index.search(searchQuery);
      const posts = refs.map(({ ref }) => lunr.en.store[ref]);
      setResults(posts);
    });
  }
}, [location.search]);
This will tell the effect to run only when the location.search changes. This is great because we can now set our input to also update the URL, which will, in turn, update the search results on the fly, rather than requiring a browser refresh.
Within our src/components/searchForm.js, import navigate from Gatsby. Navigate is a method supplied to Gatsby once again from Reach Router, and allows us to programmatically change the URL, without requiring a hard refresh.
import React from 'react';
import { navigate } from 'gatsby';
We can then call navigate whenever a user updates the value of our Search Form's input field.
<input
  type="search"
  id="search-input"
  name="keywords"
  aria-controls="search-results-count"
  onChange={(e) => navigate(`/search?keywords=${encodeURIComponent(e.target.value)}`)}/>
We also need to make sure that when a full page refresh occurs (such as when a user submits the form), we keep the input's value and the query string in sync. Currently, the input's value would be wiped on a page refresh.
We can fix this by first going back into our search page (src/pages/search.js) and passing down the query string that we get from URLSearchParams.
const Search = ({
  data,
  location
}) => {
  const [results, setResults] = useState([]);
  const searchQuery = new URLSearchParams(location.search).get('keywords') || '';
  useEffect(() => {
    if (searchQuery && window.__LUNR__) {
      window.__LUNR__.__loaded.then(lunr => {
        const refs = lunr.en.index.search(searchQuery);
        const posts = refs.map(({ ref }) => lunr.en.store[ref]);
        setResults(posts);
      });
    }
  }, [location.search]);

  return (
    <Layout location={location} title={data.site.siteMetadata.title}>
      <SearchForm query={searchQuery} />      <SearchResults />
    </Layout>
  );
};
Then, use our new query prop as the input's value in our searchForm.js.
const SearchForm = ({ query }) => (  <form role="search" method="GET">
    <label htmlFor="search-input"><h1>Search posts</h1></label>
    <input
      type="search"
      id="search-input"
      name="keywords"
      aria-controls="search-results-count"
      onChange={(e) => navigate(`/search?keywords=${encodeURIComponent(e.target.value)}`)}
      value={query}    />
    <button type="submit">Submit</button>
  </form>
);
Try it out in the browser, with your console logging out the results state we set up.
Integration with design
We have everything we need in place. All we need to do now is hook up our results state to the design of our results area.
Pass results and searchQuery down from our page to our SearchResults component.
return (
  <Layout location={location} title={data.site.siteMetadata.title}>
    <SearchForm query={searchQuery} />
    <SearchResults
      query={searchQuery}      results={results}    />
  </Layout>
);
We can then pass them into our results counter element within /src/components/searchResults.js.
{!!results.length && query &&
  <h2
    className="search-results-count"
    id="search-results-count"
    aria-live="assertive"
  >Found {results.length} posts on "{query}"</h2>
}
Using the !! operator, we've converted the value of results.length into a Boolean. That way we can ensure that we only display our results counter when there are results to be shown.
We can also do a similar thing with the results list itself, by mapping over the results and filling in our little template with the correct values, even
{!!results.length &&  <ol className="search-results-list">
    {results.map(({      title,      url,      date,      description    }) => (      <li key={title}>
        <h3 className="search-results-list__heading">
          <a href={url} className="search-results-list__link">
            {title}
          </a>
        </h3>
        <small>{(new Date(date).toLocaleString('en-GB'))}</small>
        {description && <p>{description}</p>}
      </li>
    ))}  </ol>
}
Don't forget that key attribute I assigned to the <li/> either. Any list of React components requires unique keys to be added to each list item in order for React to be able to differentiate between them.
Take a look in the browser, you should have a fully operational search page, which dynamically pulls in results from when you type in your keywords.
We've tackled an awful lot in this post, from configuring our Gatsby plugin for Lunr.js, building out our components to be fully compliant with the WCAG accessibility specification and even touching on a little of the new features from React's latest release with the Hooks API. All of this has culminated in a very extensible site search page which can be used on our JAMStack ready projects just like this blog.
I've published a fully functional starter based on this tutorial on my Github, open source under the MIT license. Any feedback or help will be greatly appreciated moving forward.
Until next time 🌒