Introducing Laravel: Routing, Blade and Laravel Mix
Diving into the land of routing, blade templating and the new kid on the block, Laravel Mix.
TutorialIn our last post on 'Introducing Laravel' we looked at installing and setting up our application. To follow, we'll start adding some logic into our new project by utilising Laravel's routing system.
In addition, as Laravel is a MVC (Model, View, Controller) based framework we'll be looking at the V or View side of that, by experimenting with the Blade templating engine and Laravel Mix, a new addition to Laravel in it's latest 5.4 release.
This is the 2nd part of my Laravel series of posts. Check out the others from the links below once they're posted:
- Installation and setup (9th February 2017)
- Controllers and databases (coming soon)
Disclaimer
If you're new to the framework or the object-orientated land of PHP then working with Laravel may seem overwhelming at first. There may be some sections of this series that you're not too clued up on but stick with me, I'll be breaking things down into bite-sized chunks which should provide you with those illustrious "a'ha!" moments that everyone craves.
That being said, this series does expect a basic understanding of PHP or similar programming languages.
With that, let's get started.
Routing
In programming, routing is at the heart of every website, whether you know it or not. No matter their functionality, all websites must have some form of routing behind the scenes in order to work, whether this be at a server level, application level, or in most cases, a mixture of both.
Routing is the practice of taking a URI endpoint and converting it into parameters to determine what code should be ran.
Taking this blog post's web address as an example...
/posts/introducing-laravel-part-2-routing-blade-mixAside from the domain, which directs our users to the correct server, we have the following endpoints to work with.
/posts/introducing-laravel-part-2-routing-blade-mixA routing system will take these endpoints and break them down into bitesized chunks for the application to work with in a controlled environment. For my example, I've setup the Assortment blog so that it knows:
- Not only do I want to find a
post; - But I want to find a
postthat has the slug ofintroducing-laravel-part-2....
All frameworks and Content Management System's will have their own way of doing things, but I'm a big fan of Laravel's. Here's why.
Laravel routing
Laravel's routing system is designed in a very developer friendly way and if you're coming from the land of Codeigniter or other PHP frameworks where it's routing system is scattered throughout the codebase then you're going to love the fact that Laravel simplifies this into one central location.
If you don't already have a Laravel project installed from the last post then go do that now. Once installed, locate the routes folder within the root directory of our project. This folder's entire purpose is–as you might expect from it's name–to house all routing logic for your project.
In the folder are four separate files, each with their own purpose. For the majority of applications you'll be concerned with either web.php or api.php but here's a quick primer on each:
web.php- Where you can register web-based routes for your application.api.php- Where you can register routes for API endpoints.console.php- Where you can register commands to be used through your Command Line Interface (CLI) for things like deployment scripts and testing.channels.php- Where you can register broadcasting channels for your application to be used in conjunction with Websockets, creating true, realtime content streams for the web.
As we're looking at creating a little web app, we'll stick with the web.php file for now. Open up routes/web.php and let's get started. As of version 5.4, here's what that file looks like.
<?php

/*
|--------------------------------------------------------------------------
| Web Routes
|--------------------------------------------------------------------------
|
| Here is where you can register web routes for your application. These
| routes are loaded by the RouteServiceProvider within a group which
| contains the "web" middleware group. Now create something great!
|
*/

Route::get('/', function () {
  return view('welcome');
});
To declare a new route in Laravel you must use the Route class, followed by one of the available methods it has at it's disposal. The more commonly used methods mirror HTTP requests such as Route::get for a GET request, Route::post for a POST request and so forth.
These methods accept two parameters, a URI endpoint and a Closure, where the closure should return what you'd like the user to see when they visit that route.
In our web.php we currently have a GET route setup to look for the URI endpoint of /, meaning the homepage or root of the website. Once a user visits that URI we return what we would like them to see, in this case we use the view function which loads a template from the resources/views directory. This means anytime a user goes to the homepage of our project we provide them with the resources/views/welcome.blade.php template.
Get that? Cool, we'll use it as a basis to create a completely new page for our dummy project. Underneath our welcome route call the GET method on our Route class again.
Route::get();Next, add a URI endpoint of about to the first parameter as we're going to create an 'About us' page for our project.
Route::get('about');For the second parameter, create a Closure which for the time being returns 'Hello world'.
Route::get('about', function() {
return 'Hello world';
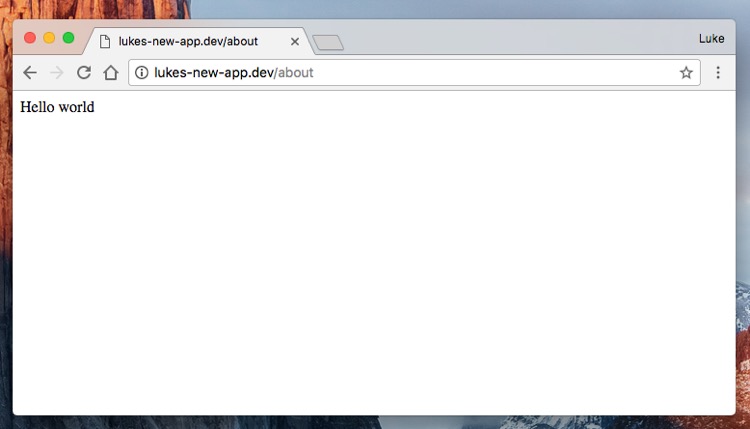
});If you go to your browser and visit the /about page you'll now see the 'Hello world' message.
That's great, our route is now working, but we do need to polish things up. Replace the 'Hello world' message with the view function calling a template named about.
Route::get('about', function() {
  return view('about');
});
We now need to create that new template. Within resources/views create a new file called about.blade.php
Notice the
.blade.phpfile extension? That tells Laravel that we want to use Blade, a templating engine baked into Laravel giving us some cool goodies to work with. More on this later.
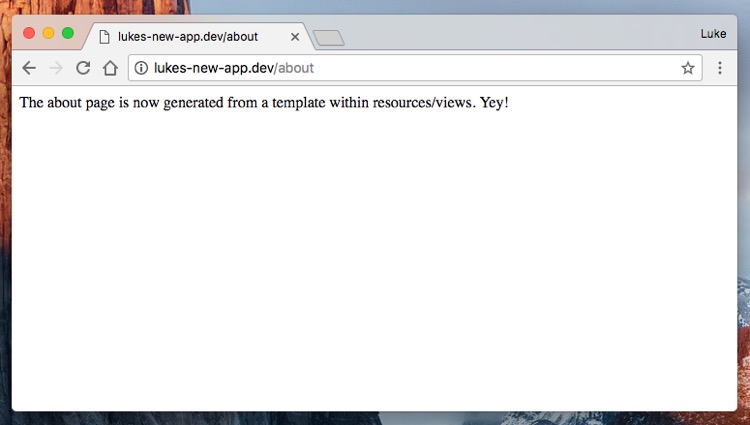
Within the new file, add a message that says 'The about page is now generated from a template within resources/views. Yey!'. If you now visit the About page in your browser you'll see that message popup. Awesome!
Templating
Now that we have a template we can start adding some HTML to provide some structure and layout to our page. Replace the contents of about.blade.php with the following HTML. Nothing fancy, just some basic formatting to give the idea of a fleshed out design.
<!DOCTYPE html>
<html>
<head>
  <meta charset="utf-8">
  <meta http-equiv="X-UA-Compatible" content="IE=edge">
  <meta name="viewport" content="width=device-width, initial-scale=1">

  <title>About page</title>

  <style>
    body {
      background: #fffefe;
    }

    .headline {
      max-width: 500px;
      margin: 2em auto;
      font-family: Helvetica, Arial, Verdana, "Verdana Ref", sans-serif;
    }

    .headline-title {
      margin: 0;
      font-size: 2rem;
      color: tomato;
    }

    .headline-text {
      margin: 0;
      color: #735e5a;
    }
  </style>
</head>
<body>

  <header class="headline">
    <h1 class="headline-title">About us</h1>
    <p class="headline-text">This is a really cool application demonstrating some core features of Laravel.</p>
  </header>

</body>
</html>
Viewing this in the browser and you'll see we've got a much nicer experience going on.

Let's do the same for the home page, within welcome.blade.php replace it's contents with the following snippet.
<!DOCTYPE html>
<html>
<head>
  <meta charset="utf-8">
  <meta http-equiv="X-UA-Compatible" content="IE=edge">
  <meta name="viewport" content="width=device-width, initial-scale=1">

  <title>About page</title>

  <style>
    body {
      background: #fffefe;
    }

    .headline {
      max-width: 500px;
      margin: 2em auto;
      font-family: Helvetica, Arial, Verdana, "Verdana Ref", sans-serif;
    }

    .headline-title {
      margin: 0;
      font-size: 2rem;
      color: tomato;
    }

    .headline-text {
      margin: 0;
      color: #735e5a;
    }
  </style>
</head>
<body>

  <header class="headline">
    <h1 class="headline-title">Homepage</h1>
    <p class="headline-text">This is a really cool application demonstrating some core features of Laravel.</p>
  </header>

</body>
</html>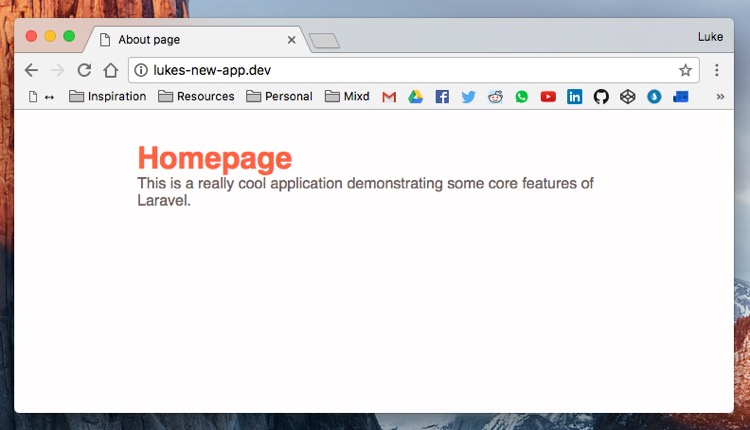
One thing you may have noticed is the overlap between our two templates. This is two fold:
- The majority of our HTML is duplicated.
- There's CSS not only duplicated, but also not in a separate file.
Blade templating engine
Luckily the first problem is where the Blade templating engine shines.
Blade is the simple, yet powerful templating engine provided with Laravel. Unlike other popular PHP templating engines, Blade does not restrict you from using plain PHP code in your views. In fact, all Blade views are compiled into plain PHP code and cached until they are modified, meaning Blade adds essentially zero overhead to your application. Blade view files use the .blade.php file extension and are typically stored in the resources/views directory.
Within resources/views create a new file called app.blade.php. This template will be our layout dummy, storing the HTML used in multiple pages to reduce duplication. In Laravel and many other frameworks, this is known as a master layout, which all other templates are derived from.
Add the following code to our new file.
<!DOCTYPE html>
<html>
<head>
  <meta charset="utf-8">
  <meta http-equiv="X-UA-Compatible" content="IE=edge">
  <meta name="viewport" content="width=device-width, initial-scale=1">

  <title>@yield('title')</title>

  <style>
    body {
      background: #fffefe;
    }

    .headline {
      max-width: 500px;
      margin: 2em auto;
      font-family: Helvetica, Arial, Verdana, "Verdana Ref", sans-serif;
    }

    .headline-title {
      margin: 0;
      font-size: 2rem;
      color: tomato;
    }

    .headline-text {
      margin: 0;
      color: #735e5a;
    }
  </style>
</head>
<body>

  @yield('content')

</body>
</html>
Notice the @yield() commands in both the <title> and <body> tags? In Blade, this creates a placeholder for other templates to use. Whenever a template extends a master template such as this, they must fill in these placeholders.
Replace the contents of your welcome.blade.php with the following.
@extends('app')

@section('title', 'Homepage ye!')

@section('content')
  <header class="headline">
    <h1 class="headline-title">Homepage</h1>
    <p class="headline-text">This is a really cool application demonstrating some core features of Laravel.</p>
  </header>
@endsection
Running through this file, the @extend('app) command tells Blade that we would like a slave template based off a master template, in this case the app.blade.php. Once that's confirmed, we fill in our placeholders with a title and content area specific for the homepage.
Let's do the same for the about.blade.php, by replacing it's contents with the following.
@extends('app')

@section('title', 'About us')

@section('content')
  <header class="headline">
    <h1 class="headline-title">About us</h1>
    <p class="headline-text">This is a really cool application demonstrating some core features of Laravel.</p>
  </header>
@endsection
If you load both of these pages up in the browser you'll notice they're the exact same, yet we now only need to edit the majority of our HTML in one place, our app.blade.php master template.
Laravel Mix
Now that we have our master and slave templates setup, we need to tackle the CSS. Laravel handles this out of the box too thanks to Laravel Mix.
Most modern projects require the use of build tools such as Gulp or Grunt to automate their compiling of assets, amongst other things. In Laravel 5.4, Laravel Mix was introduced as a successor to it's predecessor, Laravel Elixir to provide "a fluent API for defining Webpack build steps for your Laravel application using several common CSS and JavaScript pre-processors". In layman's terms it gives you a simple way of defining how your Sass is compiled to CSS, your brand-spanking JavaScript into browser compliant code and much, much more.
Before we get started, please make sure you have Node installed on your machine. Run npm -v in your Terminal application to check. If not, you can download it on the official website.
Once you've confirmed you have Node installed, within the root of your directory install your NPM dependencies.
$ npm installNote: If you're on a Windows system or running a Virtual Machine, then you may need to append the --no-bin-links flag to the end of that command.
Once installed, we can run the various tasks that are visible in your package.json file in the root of your directory. As we're currently in development, let's run the dev command
$ npm run devThis will run all the Laravel Mix tasks, however, if you're also looking to minify your output then npm run production is for you.
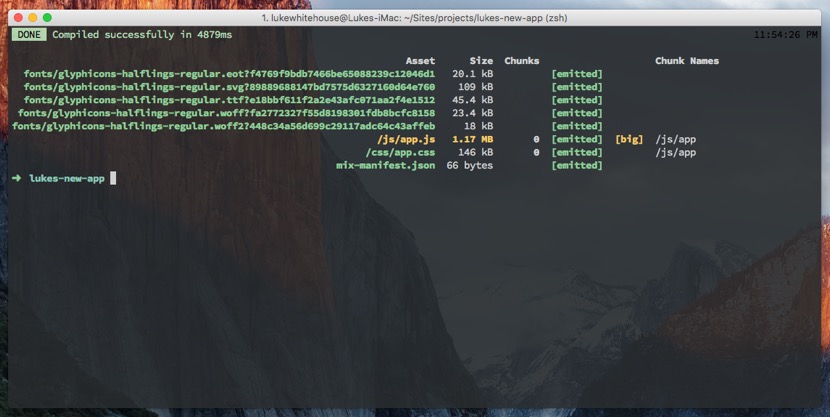
So what has that actually done? Well, if you take a look in resources/assets you'll notice the two folders js and sass. The NPM script you just ran compiled the files within there into two single files over at the public directory.
As Laravel Mix comes out of the box with the full Bootstrap framework, we can start using that to scaffold our dummy project.
Within our resources/views/app.blade.php master template, remove our current styles within the <style> tag and replace it with the following link to our new stylesheet.
<link rel="stylesheet" href="{{ mix('/css/app.css') }}">The double curly brackets {{ }} are a syntax specific to Blade similar to the opening (<?php) and closing (?>) PHP tags. Notice the mix() function between those brackets? Rather than manually writing the entire path to our CSS, we can use this function to find this file from within our public path, whilst also giving Laravel Mix the ability to do some fancy shenanigans such as cache busting in the future.
Here's how the app.blade.php file is looking at present.
<!DOCTYPE html>
<html>
<head>
  <meta charset="utf-8">
  <meta http-equiv="X-UA-Compatible" content="IE=edge">
  <meta name="viewport" content="width=device-width, initial-scale=1">

  <title>@yield('title')</title>

  <link rel="stylesheet" href="{{ mix('/css/app.css') }}">
</head>
<body>

  @yield('content')

</body>
</html>
Blade partials
To show Bootstrap is working correctly, let's add in a few components, firstly a navbar to list the two routes we have setup.
Just below the opening <body> tag in app.blade.php add the following HTML.
<nav class="navbar navbar-default">
  <div class="container-fluid">
    <!-- Brand and toggle get grouped for better mobile display -->
    <div class="navbar-header">
      <button type="button" class="navbar-toggle collapsed" data-toggle="collapse" data-target="#bs-example-navbar-collapse-1" aria-expanded="false">
        <span class="sr-only">Toggle navigation</span>
        <span class="icon-bar"></span>
        <span class="icon-bar"></span>
        <span class="icon-bar"></span>
      </button>

      <a class="navbar-brand" href="#">Lukes new app</a>
    </div>

    <!-- Collect the nav links, forms, and other content for toggling -->
    <div class="collapse navbar-collapse" id="bs-example-navbar-collapse-1">
      <ul class="nav navbar-nav navbar-right">
        <li><a href="/">Home</a></li>
        <li><a href="/about">About</a></li>
      </ul>
    </div><!-- /.navbar-collapse -->
  </div><!-- /.container-fluid -->
</nav>
Next, wrap out content placeholder with a .container div.
<div class="container">
  @yield('content')
</div>
You can see already that the templates could start getting messy. By creating partials for our different components and using Blade to bring them in we can remedy that. Within resources/views create a new folder called partials and create a file called navbar.blade.php. Move the navbar component code from app.blade.php and place it in here. In it's place, add a Blade include to load in that new file.
<!DOCTYPE html>
<html>
<head>
  <meta charset="utf-8">
  <meta http-equiv="X-UA-Compatible" content="IE=edge">
  <meta name="viewport" content="width=device-width, initial-scale=1">

  <title>@yield('title')</title>

  <link rel="stylesheet" href="{{ mix('/css/app.css') }}">
</head>
<body>

  @include('partials/navbar')

  <div class="container">
    @yield('content')
  </div>

</body>
</html>
Again, you'll notice nothing has changed other than your files are much easier to read. Finally, going back into the navbar.blade.php partial, we can finish up by creating better links to our routes. Currently we have the link for the homepage set as href="/" and the link to the about page set as href="/about". As Laravel may not always be in the root of the directory, it's best to use Laravel's url() helper function to define any links for the time being.
<li><a href="{{ url('') }}">Home</a></li>
<li><a href="{{ url('about') }}">About</a></li>
Refresh the page for a final time and you'll notice the links still work as expected, but now they're less prone to errors.
View the code for this tutorial on Github
A little explanation on a few areas
Naturally with a series like this I won't be starting off with the absolute production ready code and there may be some areas in this post that you feel could be done better, and I'd agree. Please remember that this is an introductory series and as such I do not want to overburden people who are completely new to Laravel.
That being said, here's a few things I'd like to address in future posts.
Parameters for Route::get() and similar
In the post I elude to the idea that there are two parameter's for the various HTTP methods available to the Route class. Whilst true, rather than provide a Closure for the second argument you can instead reference a Controlller. We'll be covering this in the next post.
Usage of the url() helper function
Once we have controllers setup we'll be looking into the action() and even the route() functions once we have named routing setup. Again, one for a future post.
Concluding thoughts
We've touched on a lot of core topics for Laravel in this tutorial and there's much more that could be said about each. If Laravel is a framework you're eager to research I'd definitely recommend giving the official documentation a good read through and a subscription to Laracasts would do you wonders.
In the next post in this series I'm planning on introducing the concept of Controllers and how databases are configured in a Laravel project. Got any suggestions, I'd love to hear about them, please leave me a comment!
Until next time